
When working with MVC, it is easy to get into the habit of passing large amounts of model data around your different views, including partial views. It is easier, and much faster to pass the same model, with all of the data you might, or might not need. In applications where speed and performance must be considered, this is not the best practice. It can also become confusing to other coders that may be working on the project. For example, a simple change to the model might have unintended side-effects because that model is being passed around multiple views. Using thin models that contain only information that will be used is ideal.
Most MVC projects will end up with at least a couple of partial views. An ideal time to reduce your model data is when you are rendering a partial view. Instead of passing the entire model to your partial, you can create your models in a way that only requires you to pass part of the model to the partial.
With a little planning, you can reduce the data your partial needs and build a custom model that has a container for the partial information only.
In this example, I am using a fresh MVC 3 project with the Razor view engine.
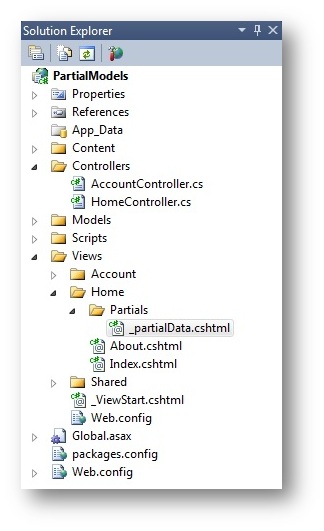
1) To the base project, add a “Partial” directory to the “Home” directory in the “View” folder. Inside the partial directory, add a partial view called “_partialData”.
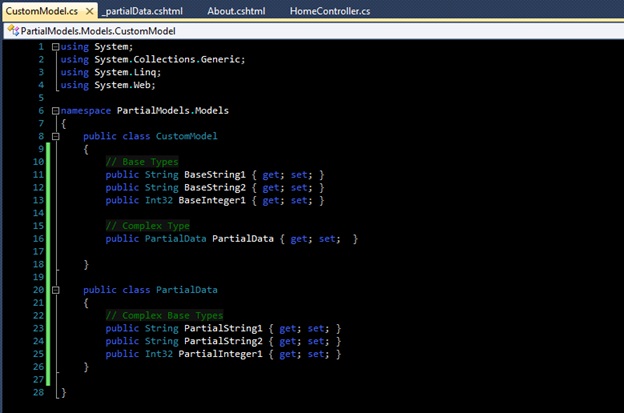
2) Now that we have our partial, it is time to create our custom model. In the “Model” directory, add a class called “CustomModel”. This model should contain a couple of base types as well as a complex type that contains a couple of base types. Here is an example:
3) The next step is to add the model to the base “About” view. At the top of the view, add the following line:
@model PartialModels.Models.CustomModel
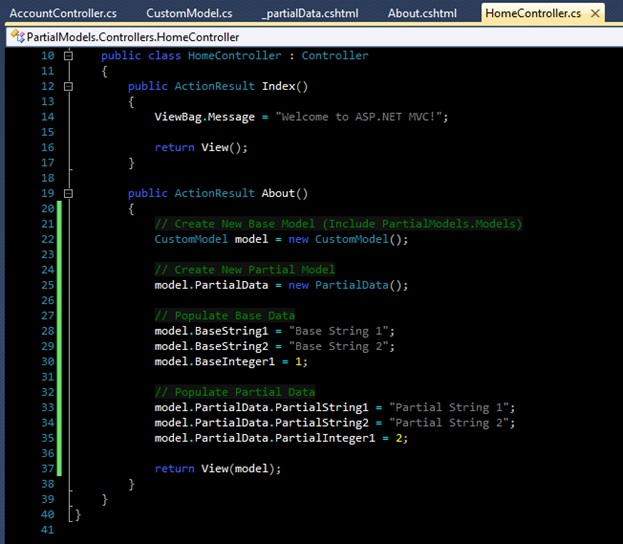
4) Now you need to add some data to your model, and pass it to the “About” view. To do so, create a new instance of the “CustomModel” class in the “Home” controller. Populate all of the variables with some data, and pass the model back to the” About” view. Here is an example of the “Home” controller with the populated “About” action:
5) Now would be an excellent time to run your project and check for errors. If you have any errors, fix them and move on.
6) Now it is time to display the data we just populated in the base view. Move to the “About” view and add display fields for the new data. Here is an example:

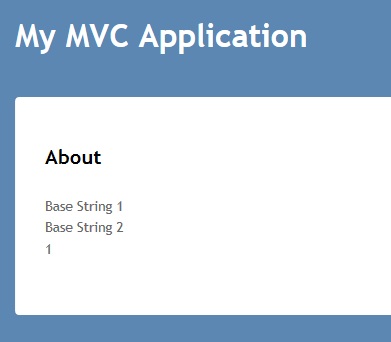
And here is your new view.
7) Now we need to display the partial with only the “PartialData” portion of the model. The partial view will not use the base model data, so there is no need to pass that data to the partial. This just consumes resources. Under the display fields paragraph in the “About” view, add the following line:
@Html.RenderPartial(“Partials/_partialData”, Model.PartialData)
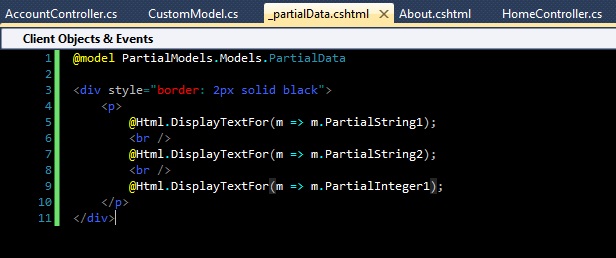
8 ) The “_partialData” partial view is not ready to accept model data. To accept the passed model, add the following line to the “_partialData” partial view:
@model PartialModels.Models.PartialData
9) Run the project and make sure you don’t have any errors.
10) All that is left to do is display the partial view with the partial model populated. To do this, add display fields for the model data to the “_partialData” view. Here is an example:
11) Now run your project. If you have no errors, you will see the base “About” view populated with the base model information. You will also see your partial view displayed and populated with your partial model data. I have added a border for emphasis.
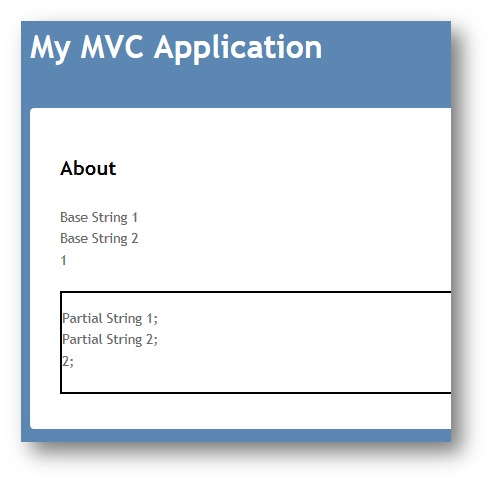
The important part of this example is that the partial view was passed only the data that it needed, and nothing more. The base data was used by the base view, and the partial data was passed along to the partial view. This is an extremely simplified example. As your models get larger and contain more data, and your partial views get more complex, this consideration and planning will help keep your website performing smoothly and efficiently.